
Extending Django Import Export: our experience developing an Open Source package
In many software projects, sooner or later, there arises a need to reuse code. Sometimes such code can be extracted into a standalone package that can be maintained independently and easily plugged into other applications. If the package solves a common problem and could be useful to others, it may be worth open-sourcing it. This gives other developers the opportunity to adopt and use your library.
However, preparing open-source code—setting up the repository, CI, and workflows—may often differ from a company’s internal standards. One of our implemented open source projects was an extension for the popular Django package django-import-export. Using it as an example, we’ll walk through all the steps needed to publish your own library.
- Why we needed to create a library
- When did we realize the project should go open source?
- Where to start the project?
- Cookiecutter-based templates for Django apps
- Basic repository settings
- Documentation
- CI Setup: Automation and Cross-Version Support
- Third-party integrations: documentation hosting, coverage, publishing
- The release
Why we needed to create a library
Originally, we used django-import-export in one of our projects to import and export data. With increasing data size, the operations became slow, and we needed support for running tasks in the background.
We searched for existing solutions, but at that time found none that were convenient, reusable, and appropriate for our needs. So we decided to develop our own solution. There was no need to build everything from scratch, though, as we could simply extend the existing import-export functionality. The original package introduces the concept of Resource entities, which, like serializers in DRF, defines the logic for data uploading, so that’s why we needed to extend the Resource class to integrate interaction with Celery, the tool for distributed execution of background tasks. We successfully extended the code; it’s just that, initially, all of it was located directly in the project’s repository and was tightly intertwined with the business logic. This solution worked successfully for several years until the need arose to implement a similar data import and export mechanism in another project.
At that point, we decided to move the functionality into a separate repository. This helped avoid code duplication, simplify maintenance, and ease future refactoring. Gradually, we transferred the background import/export data logic, optimized database queries, and added auxiliary components—such as new widgets. As a result, we developed a full-fledged set of extensions for the original django-import-export package.
When did we realize the project should go open source?
After testing and stabilizing the new package, we wanted to use it in our other internal projects that required import/export functionality. However, installing a dependency from a private Python repository proved not the most convenient: it requires additional CI setup and access control configuration.
Besides, the package turned out to be genuinely useful—it solves a common problem faced by many developers. We didn’t just add Celery support for background tasks: we also introduced several major and useful improvements. Since Django projects often have an API layer, we’ve added the ability to easily integrate the interface for managing imports and exports of any model. We also added widgets and field classes that simplify importing complex model relationships and handle file imports. Ultimately, we ended up with significant enhancements that, in our view, could be valuable for many projects.
The next logical step was to open-source the project and package it as a fully-fledged open-source solution. First, this would significantly simplify the dependency installation in all our projects. Plus, the community could suggest improvements, find bugs, and help with development. And of course, we just wanted to contribute to open source.
However, we still needed to figure out how to properly structure the repository, configure tools, and wire everything together.
Where to start the project?
So, after all the preparations, we were faced with a logical question: how to properly format the repository so as not to forget or miss anything? A high-quality library includes not only code but also documentation, a license, code-quality check settings, and other essential files that make the project look complete.
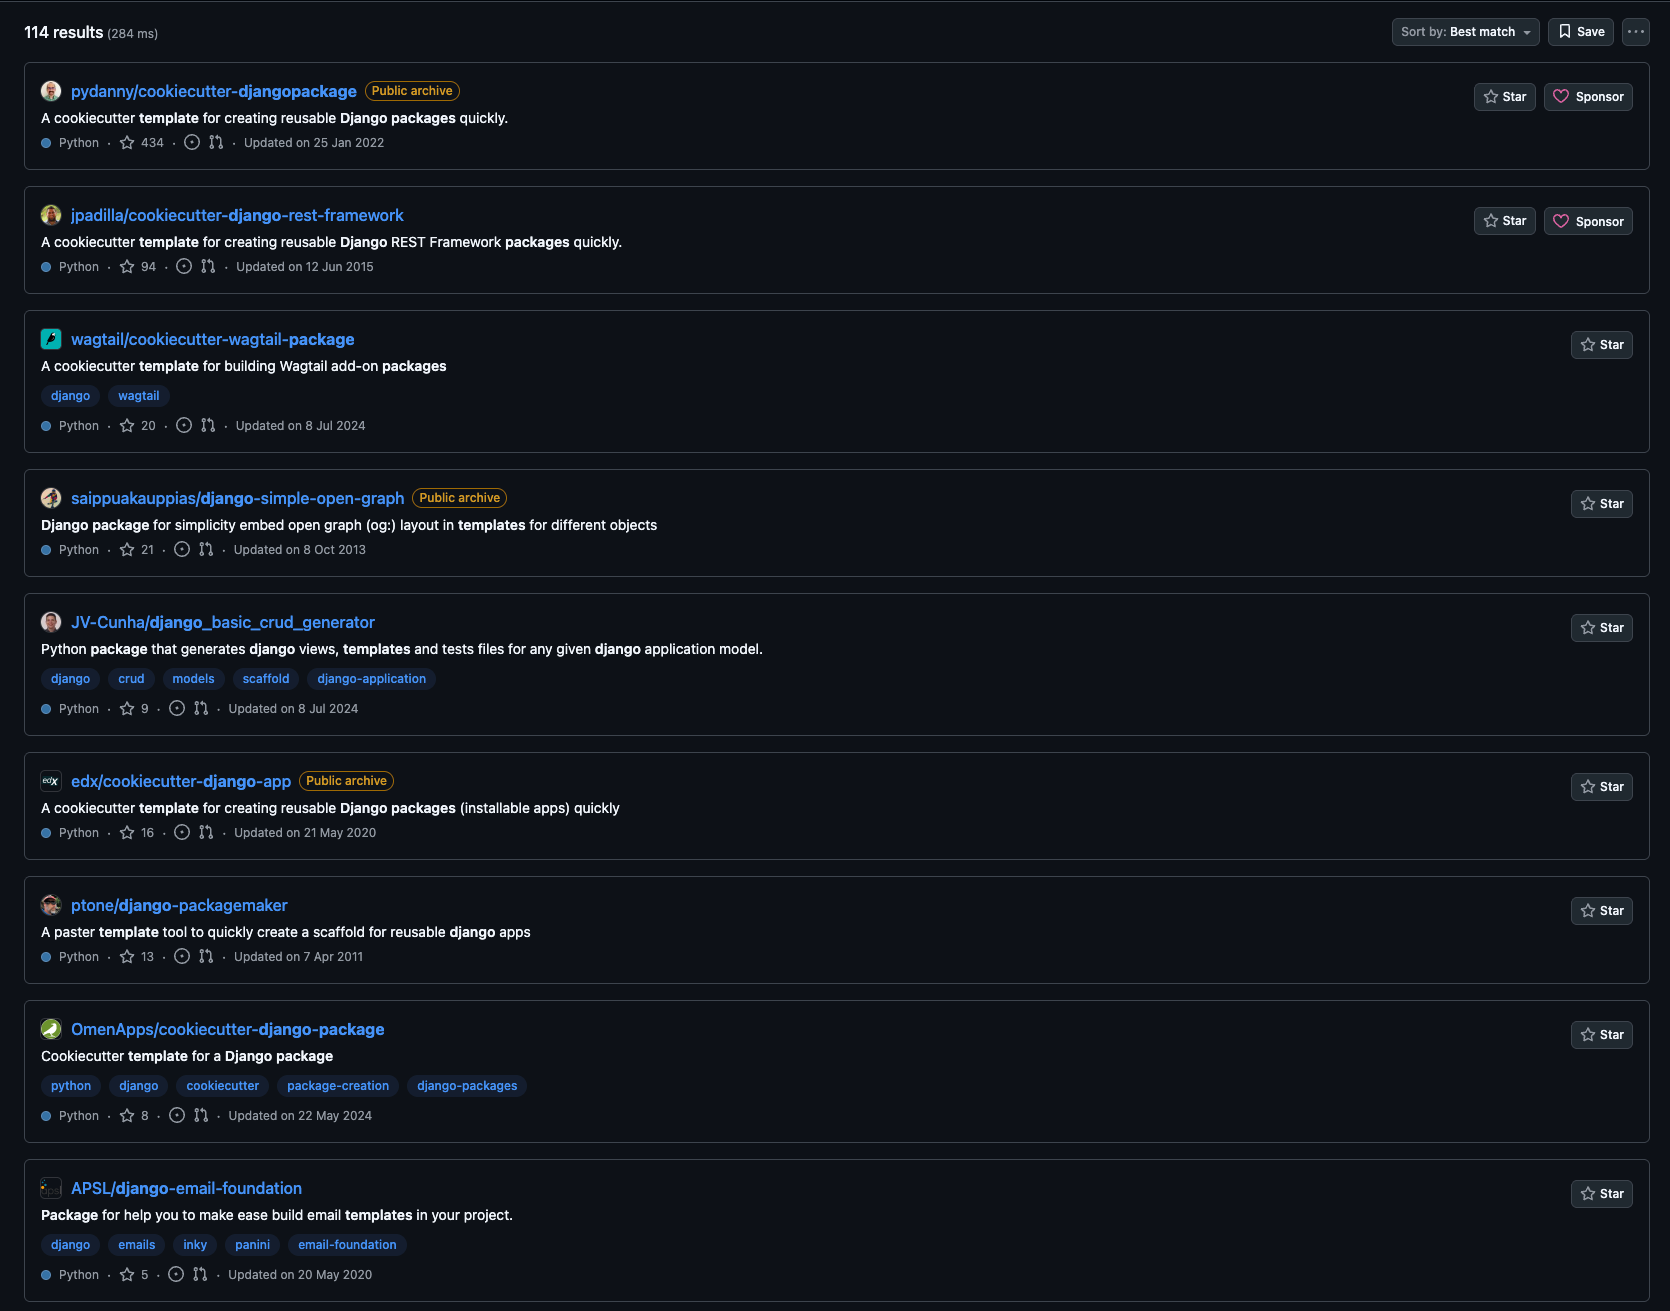
To simplify the process, we decided to use a ready-made template. GitHub offers many repositories designed for cookiecutter—a templating tool that allows you to deploy a project structure with all the necessary files and settings in just a few minutes, simply by filling out the answers to questions.
In other projects, we use copier, a tool similar to cookiecutter but capable of keeping a project synchronized with its template. This is useful when developing multiple projects, when you need to maintain them in a single style and with common configurations. But for an open-source library, such flexibility is rarely needed—it’s just enough to generate the structure once and then maintain it manually.
Using a template let us focus on the logic of the package itself instead of spending time assembling the environment from scratch.
Basic repository settings
After generating the base template, the next step was to bring the project in line with common conventions for Python/Django open-source libraries. This makes sure the package is clear and convenient both for us and for future contributors.
The first thing to consider is the project structure. All library source code must be located in a separate directory with the name of the package itself. This prevents conflicts with other files (tests, setup.py, etc.) and makes the structure predictable.

Structure of the django-import-export-extensions application
Documentation
Documentation is one of the most important parts of any Open-Source project. We use Sphinx to generate documentation directly from docstrings and markdown files. To simplify the generation process and avoid remembering long commands, you can use a Makefile. We chose what we consider a more “pythonic” approach: instead of Makefile, we use Invoke, a convenient tool for writing and running CLI commands inside a project. For example, generating documentation only requires running inv docs.build.
Additionally, we plugged in saritasa-invocations, our own support Open-Source package containing ready-made Invoke tasks. This lets us quickly add useful scripts without writing them from scratch.
import pathlib

import invoke
import saritasa_invocations

LOCAL_DOCS_DIR = pathlib.Path("docs/_build")


@invoke.task
def build(context: invoke.Context):
    """Build documentation."""
    saritasa_invocations.print_success("Start building of local documentation")
    context.run(
        f"sphinx-build -E -a docs {LOCAL_DOCS_DIR} --exception-on-warning",
    )
    saritasa_invocations.print_success("Building completed")
Next is the README.md file. It might seem like a detailed usage description needs to be written here. Or, conversely, if the documentation already contains all the instructions, maybe you can just provide a link to it? In fact, README.md is the first thing a person sees when opening a repository. That’s why it is important to find a balance here and reflect the main essence of the project, as well as at least a basic example of use. This way, people can quickly understand how the package is used and whether it’s suitable for them.
There are also other md files in Open Source repositories. The most important of them include HISTORY.md (or CHANGELOG.md) and CONTRIBUTING.md.
HISTORY.md makes it much easier to track changes than browsing the commit history.
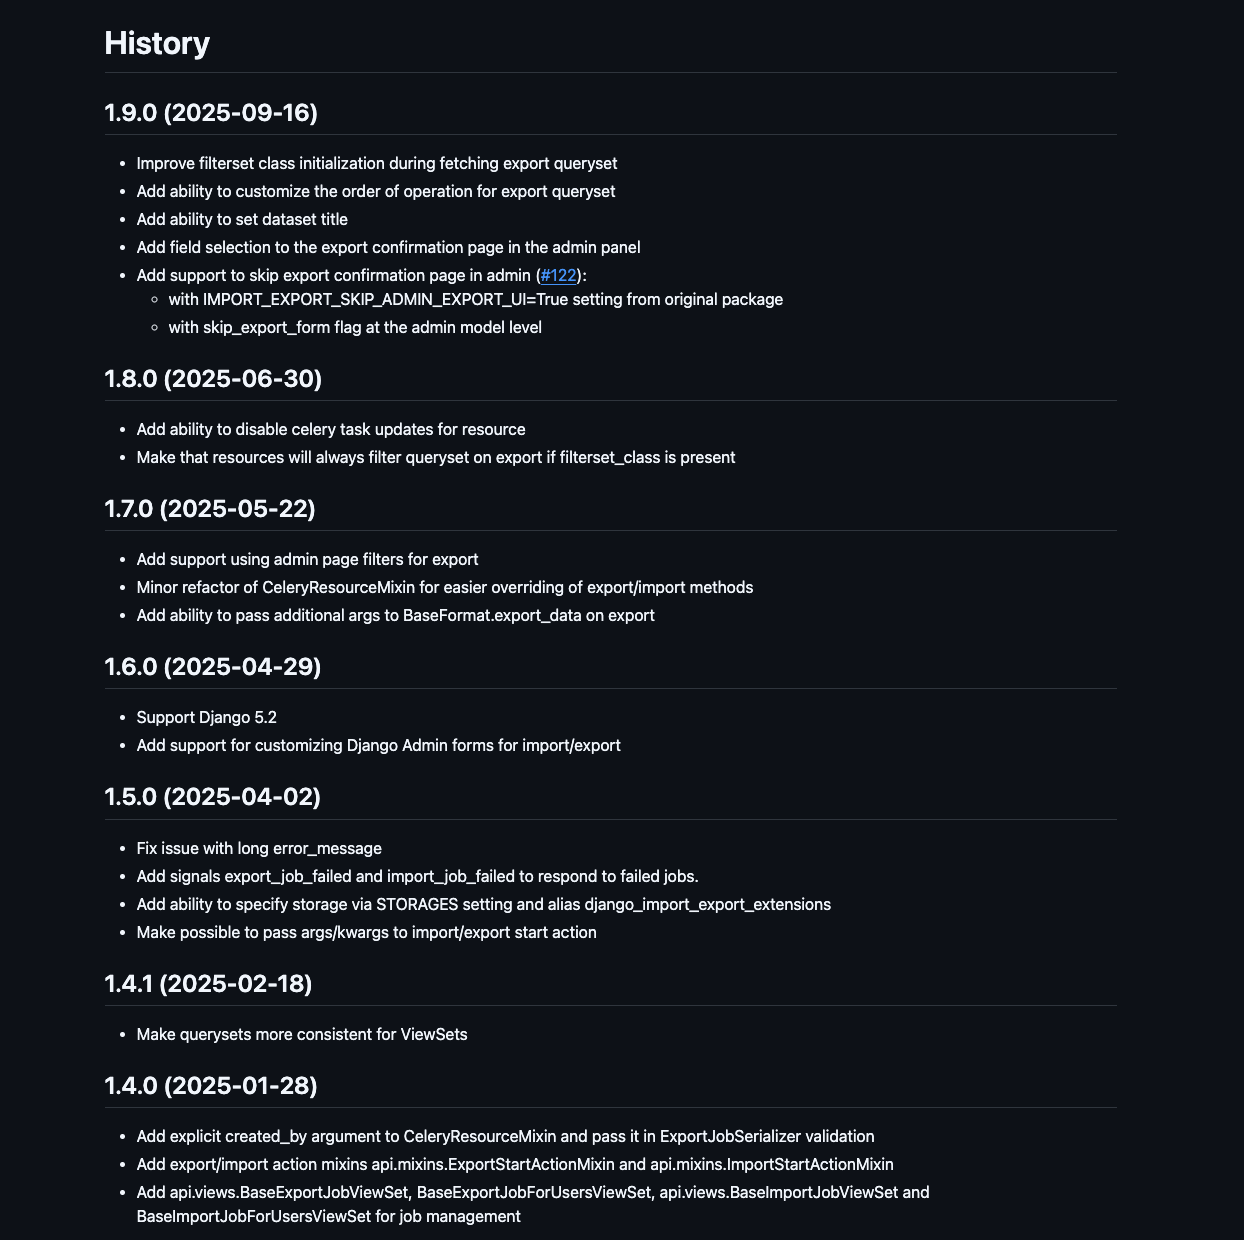
Contents of HISTORY.md
CONTRIBUTING.md provides clear instructions for external developers who wish to contribute. We’ve detailed the process of opening a Pull Request, the code style, and how to run tests locally so that contributors can focus on adding new logic.
We place tests in a separate tests/ directory and write them using pytest. Since our package is a Django library, for more convenient and comprehensive testing, we have created a small test project. We connect all our components to it and can already test interaction with the framework: with models, forms, and the admin panel.
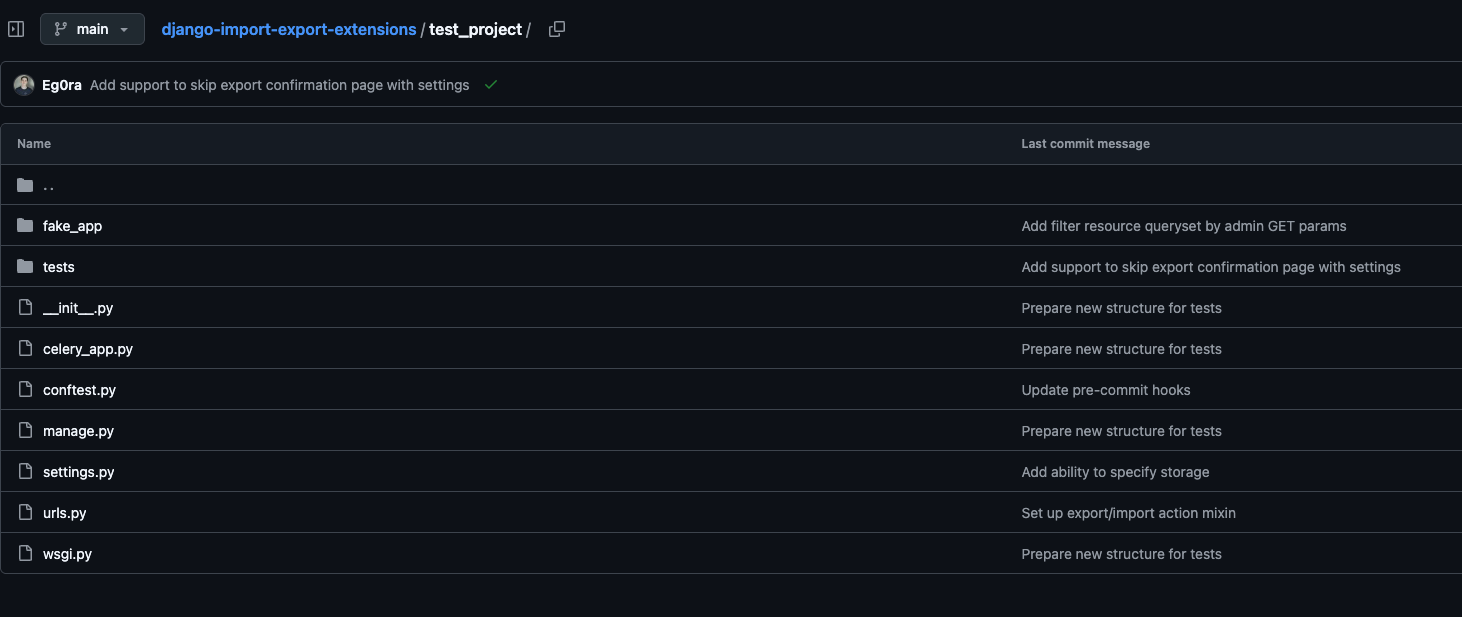
Test Project Structure
We manage dependencies using Poetry, which also handles building and publishing the package to PyPI. It’s a modern and convenient tool suitable for both internal and open-source projects. Although it’s currently being replaced by uv, a package manager written in the Rust language. We plan to migrate to it in the future, but to keep dependency versions up-to-date, we use GitHub Dependabot, which doesn’t yet provide full support for uv.
Using all these approaches and tools allowed us not only to maintain order in the code, but it also made the project as convenient and understandable as possible for external users.
CI Setup: Automation and Cross-Version Support
One of the important aspects of any repository is having a configured CI. In open-source, this becomes even more important because some code might be submitted by external developers, and manually checking everything would be too time-consuming. A properly configured CI will not only reduce the amount of verification work but also make things easier for contributors, because they’ll be able to see issues immediately after opening a Pull Request.
First, we configured pre-commit – a tool that runs a series of checks before changes are pushed to the repository. We included the following hooks in the configuration:
- ruff – a modern, fast Python linter replacing flake8, isort, and docformatter
- Additional linters & formatters for HTML, YAML, and other file types
- Migration file checks
- Test execution
- Checking for successful documentation generation, as well as for error-free assembly and installation of the package
In addition to static checks, we added pre-commit tests so that you can quickly verify the code’s functionality.
One of the main differences between open and internal libraries is the need to support multiple versions of Python and Django. To ensure compatibility, we configured GitHub Actions using a matrix strategy: this allows tests to run on different combinations of Python and Django versions automatically.
name: Run tests and style checks
on:
  pull_request:
  push:
    branches: [main]
jobs:
  test:
    runs-on: ubuntu-latest
    strategy:
      fail-fast: false
      matrix:
        python-version:
          - "3.10"
          - "3.11"
          - "3.12"
          - "3.13"
          - "3.14"
        django-version:
          - ">=4.2,<4.3"
          - ">=5.0,<5.3"
    name: Python ${{ matrix.python-version }} - Django ${{ matrix.django-version }}
    steps:
      - name: Check out repository code
        uses: actions/checkout@v5
      - name: Set up Python ${{ matrix.python-version }}
        uses: actions/setup-python@v6
        with:
          python-version: ${{ matrix.python-version }}
      - name: Install Poetry
        uses: snok/install-poetry@v1
        with:
          version: latest
          virtualenvs-create: true
          virtualenvs-in-project: true
          installer-parallel: true
      - name: Cache poetry dependencies
        id: cached-poetry-dependencies
        uses: actions/cache@v4
        with:
          path: .venv
          key: ${{ runner.os }}-${{ matrix.python-version }}-poetry-${{ hashFiles('**/poetry.lock') }}
      - name: Cache pre-commit
        uses: actions/cache@v4
        with:
          path: ~/.cache/pre-commit
          key: ${{ runner.os }}-${{ matrix.python-version }}-pre-commit-${{ hashFiles('**/.pre-commit-config.yaml') }}
      - name: Install local dependencies
        if: steps.cached-poetry-dependencies.outputs.cache-hit != 'true'
        run: poetry install --no-interaction
      - name: Install Django
        run: |
          poetry run pip install 'django${{ matrix.django-version }}'
      - name: Prepare env
        run: |
          poetry run inv ci.prepare
      - name: Run checks ${{ matrix.python-version }}
        run: poetry run inv pre-commit.run-hooks
      - name: Coveralls Upload
        uses: coverallsapp/github-action@v2
        with:
          github-token: ${{ secrets.GITHUB_TOKEN }}
          flag-name: Python${{ matrix.python-version }} - Django${{ matrix.django-version }}
          parallel: true
  coveralls-finish:
    needs: test
    if: ${{ always() }}
    runs-on: ubuntu-latest
    steps:
      - name: Coveralls Finished
        uses: coverallsapp/github-action@v2
        with:
          github-token: ${{ secrets.GITHUB_TOKEN }}
          parallel-finished: true
This way, with each commit or pull request, tests are run against different versions, ensuring that our package will work in all supported versions.
Third-party integrations: documentation hosting, coverage, publishing
Although we already had documentation generated using Sphinx, reading it in local HTML files wasn’t very convenient. So, our next step was setting up automatic publishing of the documentation on Read the Docs.
We registered an account and connected our repository. After that, we set up two versions of the documentation:
- latest – built automatically from the main branch
- stable – linked to the most recent release tag (e.g., v1.0.0)
Now the documentation is always available online and updates automatically – this greatly simplifies work for both us and our users.
To track how well our code is covered by tests, we’ve integrated Coveralls. It collects reports after test runs and visualizes coverage by file, helping you see which sections of code remain untested and where tests need to be added. Integration with GitHub Actions is quite simple: just add a coverage file upload step to your existing CI.
Next, we published the library to PyPI so it could be installed with any package manager.
We created a separate PyPi account and generated a token, which we then connected to Poetry. This made it easy to upload a new version using the `poetry publish –build` command. Now, each new version can be published in a couple of minutes—without manual builds or complex configurations.
Thanks to all these integrations, we added informative badges to README.md, including:
- build status
- latest package version
- test coverage
- documentation status
These provide quick insight into the current status of the project.
Badges for displaying current data
The release
Finally, once we’d finished setting things up, we needed to conduct an even more thorough review before the first full release. PyPI allows you to mark a project as production-ready, and we settled on 4 – Beta. Even though the package had already been used in several of our projects, after restructuring and improvements, we were not yet sure that there would be no problems at all.
A few months of use, a few more improvements, and we’re ready for the 1.0.0 release.
Along with the final release, we also updated the readiness rating to 5 (production), and opened a pull request in the original project’s repository to add a link to ours. This way, people can see that Celery-related functionality is already implemented in our project.
We’ve already accepted some changes from other developers, including the main contributor to the original django-import-export package.
Now all that’s left for us to do is develop Django Import Export Extensions, resolve issues, check pull requests, and wait for new stars in our repository.
If you have ideas for improvement or just want to contribute to the project, welcome!